

How to Apply Danish Oil and Care for Wood Furniture
A refined oil finish comes from patience and a light hand, not from flooding the surface. Danish oil is a wood finish made with blends that vary by product; for most bare wood, three coats are recommended. This Danish oil furniture maintenance guide explains how it can add water resistance, why a test patch matters, and how to apply it without leaving sticky excess behind.
It’s natural to want to protect a favourite piece while preserving the grain and character that make it special. A careful approach means preparing the surface, applying thin coats and allowing the finish to dry as directed on the product label.
This guide explains what Danish oil does, how to apply it with a brush or cloth, and how to deal with excess oil if the surface turns tacky. These steps can help you care for wood furniture thoughtfully, whether you’re maintaining a treasured piece or choosing furniture for your home.
Key Takeaways
- Prepare clean, dry bare wood by sanding with the grain, then test the oil on a hidden area to see how it changes the colour and grain.
- Apply thin coats with a brush or cloth, wipe away excess after it has soaked in, and allow the finish time to cure before buffing.
- If the surface turns sticky, remove the excess carefully; dried residue may need a suitable paint stripper used according to its instructions.
- Keep an oiled finish looking its best with gentle cleaning, and refresh high-wear areas when needed.
Applying Danish oil with a brush or cloth
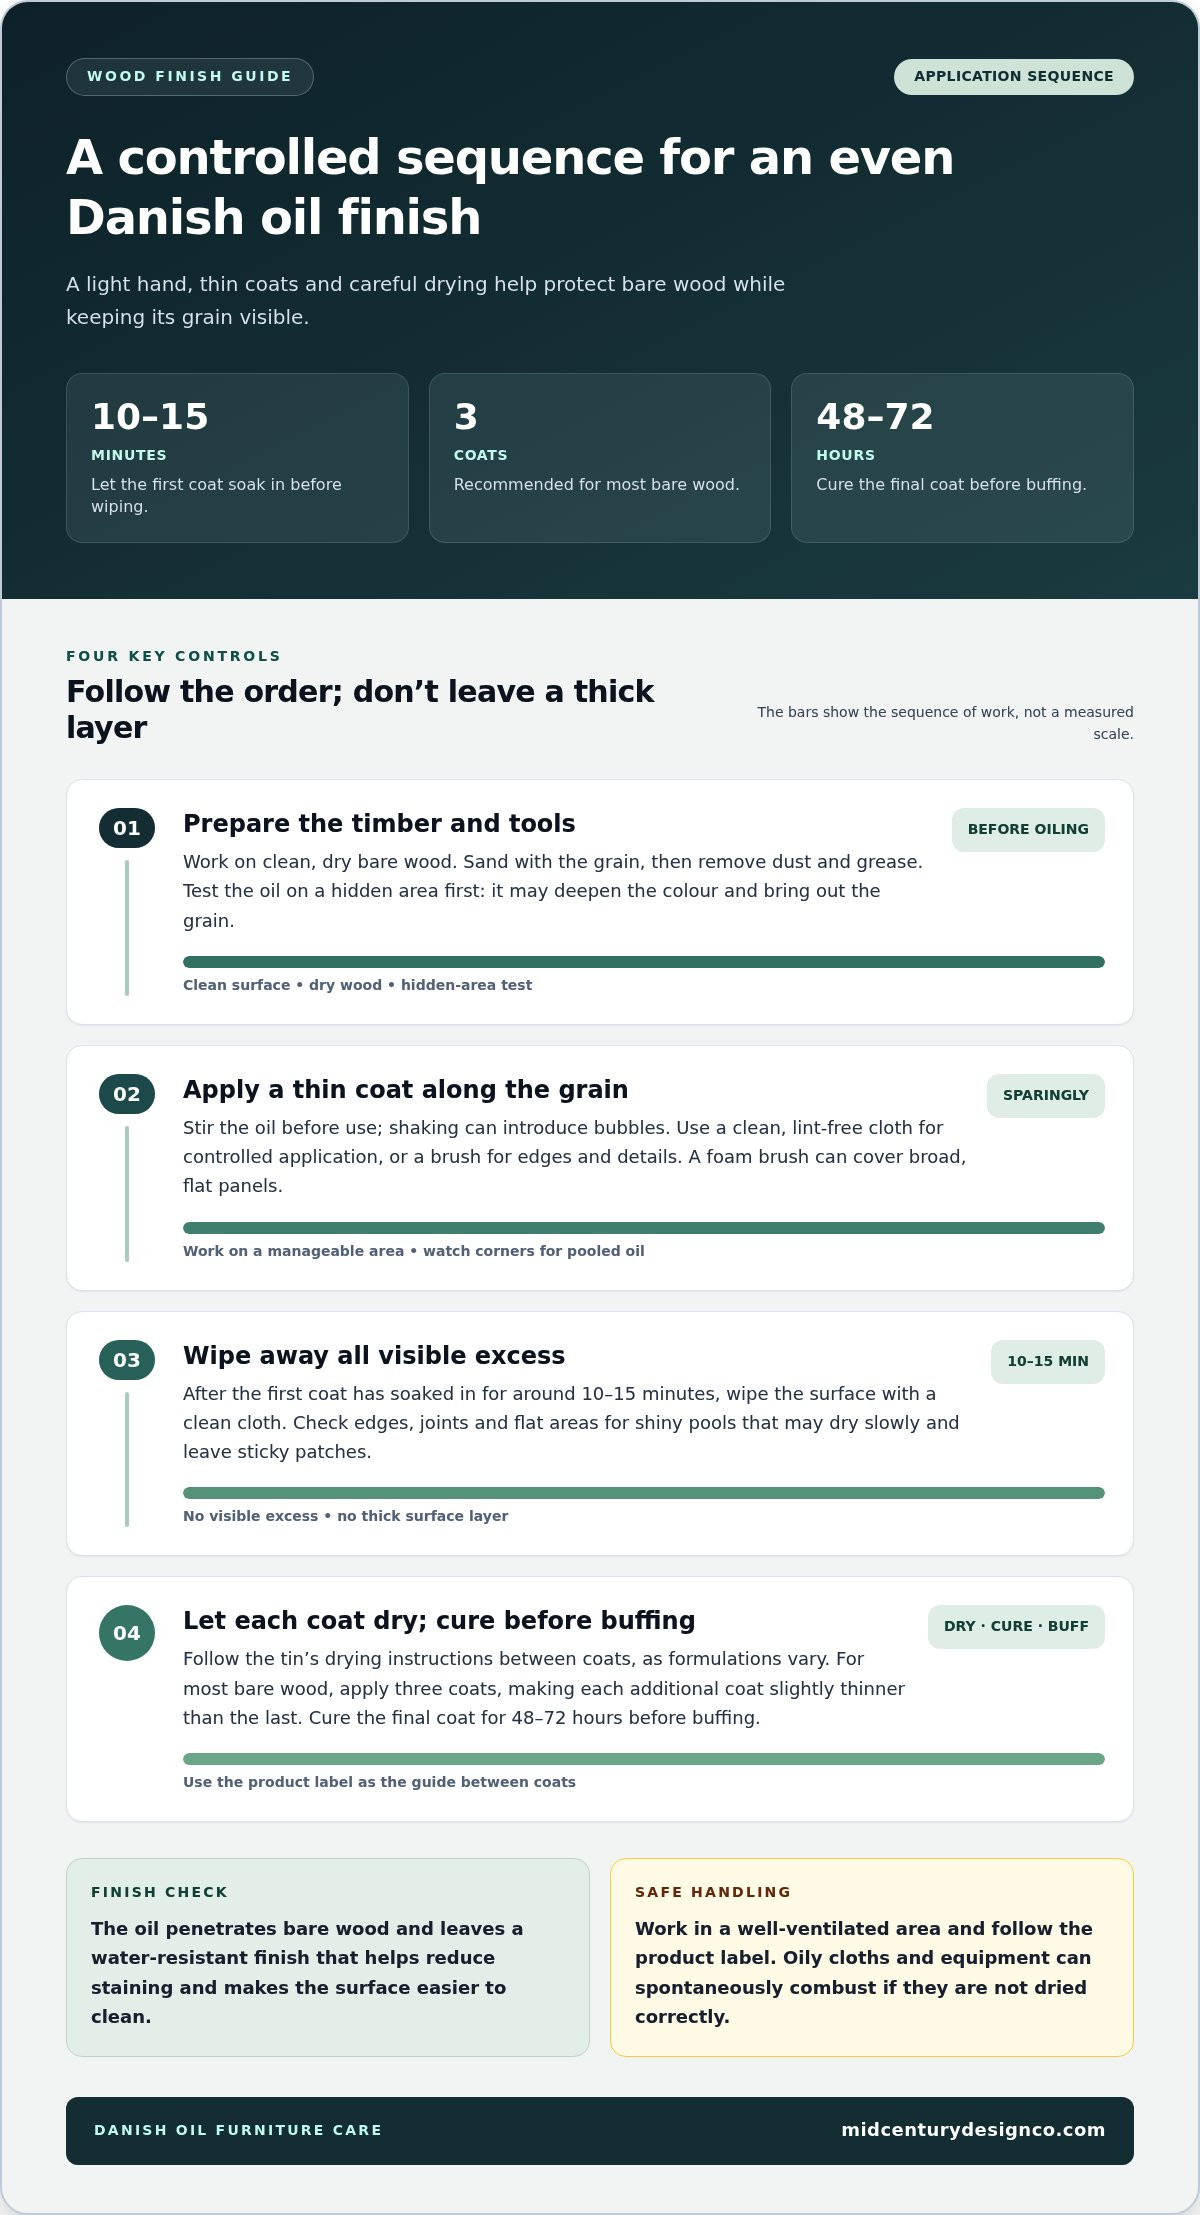
Work on clean, dry bare wood, and follow the Danish oil tin’s instructions, as application requirements vary. Oily cloths and equipment can spontaneously combust if they aren’t dried correctly. Work in a well-ventilated area and follow the product label for safe handling.
-
Choose a brush or cloth
Stir the Danish oil before use. Shaking can introduce bubbles that mark the finish. Choose a clean, lint-free cloth for controlled application, or a brush to reach edges and details. A foam brush can spread a thin coat over broad, flat panels; use smooth strokes and watch for pooled oil in corners. Keep your tools clean as you work.
-
Apply the first coat along the grain
Apply Danish oil sparingly in the direction of the wood grain, working on a manageable area at a time. Following the grain helps the oil settle evenly and lets the timber’s natural character show through. Test a hidden area first to see how the oil may deepen the colour and highlight the grain before treating the whole piece.
-
Wipe off excess oil
Let the first coat soak into the wooden surface for around 10-15 minutes, then wipe away all visible excess with a clean cloth. Check edges, joints and flat areas for shiny pools, which can dry slowly and leave sticky patches. Don’t leave a thick layer on the surface; wiping correctly helps the finish dry more evenly and keeps the wood’s beauty clear.
-
Allow coats to dry before reapplying
Let each coat dry according to the tin’s instructions before applying another, since Danish oil formulations vary. For most bare wood, three coats are recommended, with each additional coat slightly thinner than the previous one. Allow 48-72 hours for the oil to cure before buffing the final coat. Apply in a well-ventilated space; the smell usually disappears after about a day.
What’s the difference between Tung oil and Danish oil?
Tung oil is a particular oil; Danish oil describes a finish whose ingredients and instructions vary by product. When choosing a furniture finish, compare the tin’s drying directions and intended result. Build protection in controlled coats rather than assuming both oils behave alike.
- Follow the product’s drying instructions between coats. Danish oil must dry before you apply another layer, but the interval depends on the formulation and conditions. Read the tin and check that the surface feels dry before continuing. If it remains tacky, allow more time. Adding oil too soon can leave excess on the surface and disrupt even drying. Follow the label rather than borrowing a schedule for Tung oil or another finish.
- Build the finish with thin, even coats. For most bare wood, three coats of Danish oil are recommended. Make each additional coat slightly thinner than the previous one to build the finish gradually without leaving a heavy layer on the surface. Apply only enough to cover the timber, then wipe away excess with a clean cloth. This measured approach helps keep the grain visible without creating the feel of thick varnish.
- Smooth the surface between coats when needed. On Danish-oiled oak, fine sandpaper of at least 320 grit can be used to rub the surface back between coats. Work gently, then remove sanding dust before applying more oil. Keep the paper fine; the aim is to smooth raised fibres or small imperfections, not cut deeply into the finish. Buff the final coat only after it has cured for 48-72 hours.
- Refresh worn areas as part of ongoing care. High-wear sections, such as a tabletop used every day, may need a maintenance coat annually or as needed. Clean the surface first and let it dry, then apply a thin layer and wipe away any excess. Danish oil and Tung oil have different product instructions, so don’t assume one maintenance schedule suits both.
What Danish oil is and how it protects wood
Danish oil isn’t one fixed blend: ingredients and application instructions vary by product. It penetrates bare wood and leaves a water-resistant finish that helps reduce staining and makes the surface easier to clean. This Danish oil furniture maintenance guide can help you choose an approach that suits the piece and its setting.
A Danish oil labelled food safe can be used on kitchen tables or worktops that come into contact with food once it has dried completely. Food-safe status applies to that specific product, so follow its label before using the surface for food.
- Choose an oil for the furniture’s setting. Check whether the tin says the finish is suitable for interior or exterior wood. Danish oil can be used outdoors, but it wears off quickly and doesn’t provide long-term protection. For an indoor coffee table or dressing table, choose a product whose instructions suit interior furniture and the timber’s condition.
- Prepare the surface for absorption. Apply Danish oil to clean, dry bare wood. First sand away previous finishes, then remove dust and grease. Oil won’t penetrate varnish in the same way, so an old varnished tabletop needs its coating removed before oiling. Test a hidden area, as oil can darken the wood and bring out its grain.
- Match the finish to the wood and its use. Danish oil’s water resistance helps limit staining, but it doesn’t create a hard varnish layer. It suits bare wooden furniture where visible grain and a natural-looking finish matter. Consider how the piece is used: a frequently handled tabletop needs appropriate ongoing care, while an ornamental surface may see less wear. Wipe away excess oil during application to avoid sticky patches.
- Read the product instructions before choosing. Danish oil blends vary, so drying times and application requirements differ. Use this Danish oil furniture maintenance guide to compare the label’s suitable wood, intended setting and food-contact wording with your furniture’s needs. Choose a finish for the surface rather than assuming every oil product behaves alike.
Q: How do I remove excess Oil and fix the finish?
Act promptly if Danish oil pools or feels sticky. The remedy depends on whether the excess is still tacky or has dried on the wooden surface.
- Wipe away fresh excess after it has soaked in. Allow the oil around 10-15 minutes to penetrate, then remove visible pools with a clean cloth. Excess left on a tabletop can slow drying and create sticky patches. Check edges, joints and broad panels, where oil may gather unnoticed. A thin, even finish is easier to maintain than a heavy layer.
- Remove sticky oil with white spirit. If the surface remains tacky, use white spirit to remove the sticky Danish oil, then let the wood dry. Reapply with less oil, wiping away the surplus instead of leaving it to cure on the surface. Work carefully and follow the Danish oil product instructions, as formulations and application requirements vary.
- Treat dried excess with a suitable stripper. If surplus oil has dried, use a mild paint stripper suitable for Danish oil and follow the manufacturer’s instructions. Once the old finish is removed, let the wood dry and prepare the surface before reapplying. Remove dust and apply a restrained coat for a smooth result. Don’t assume a product intended for varnish is suitable for Danish oil.
- Maintain the finish with gentle care. Avoid harsh cleaners on cured Danish oil, as they can strip the finish. The surface offers water resistance, but Danish oil wears off quickly outdoors and doesn’t provide long-term protection. For indoor furniture, refresh high-wear areas annually or as needed. Unlike a film finish, an oiled surface can be refreshed locally, helping enhance the grain without building up a thick coating.
For a carefully chosen piece to care for at home, browse coffee tables and occasional tables.
The Mid Century Design: Sideboards & Storage
The Mid Century Design Company offers Sideboards & Storage for homes where considered design meets practical organisation. Once you understand how an oiled finish can reveal timber grain, you may be looking for furniture whose character feels at home in your space. A sideboard brings useful storage and a distinctive presence to a dining room, while a chest of drawers or coffee table can shape a quieter corner.
Choose The Mid Century Design Company when you’re looking for furniture to complement the atmosphere you’re creating, rather than help with refinishing or repairs. Explore Sideboards & Storage, Dining Sets, Chest of Drawers, and Coffee Tables & Occasional Tables to find a piece that suits your room and daily routines.
Visit The Mid Century Design to explore the furniture.
Choose pieces that will grow with your home
Caring for wood is also an invitation to notice how a piece lives in your space. As you move from maintenance to furnishing, consider the character you want a room to hold: a sideboard can anchor a dining area, while a chest of drawers brings considered storage to a bedroom. A Danish oil furniture maintenance guide is one part of a lasting relationship with furniture, where thoughtful care meets personal surroundings.
The Mid Century Design Co. offers Sideboards & Storage, Dining Sets and Chest of Drawers for homes shaped by practical needs and a lasting appreciation of design. Explore the collection and picture how its lines, timber and character could complement your rooms.
Contact The Mid Century Design Co. to explore furniture for your home. Let your next choice reflect the way you want to live, and enjoy making the space your own.
Frequently Asked Questions
What Is Danish Oil?
Danish oil is a wood finish made from blends that vary by product, so the tin’s instructions matter. On bare wood, it penetrates the surface and leaves water resistance that helps reduce staining and makes routine cleaning easier. Unlike a thick film finish, it keeps the grain visible, making it a considered choice for furniture whose timber character is part of its appeal.
How many coats should I apply?
For most bare wood, apply three coats of Danish oil, making each additional coat slightly thinner than the previous one. Let every layer dry as directed on the product label before adding another; if the surface is still tacky, give it more time. This gradual build helps avoid a heavy, uneven finish. On a small item, treat edges and less visible areas as carefully as broad surfaces.
What if I think I’ve applied too much oil during application?
If the oil is still wet, wipe the surface with a clean cloth and look for shiny pools along edges or joints. After around 10-15 minutes of soaking, remove remaining excess rather than leaving it to dry in place. Sticky residue can be removed with white spirit, followed by drying and a lighter reapplication. For dried excess, use a mild stripper suitable for Danish oil according to its instructions.
Why doesn’t Danish Oil dry like varnish or lacquer?
Danish oil penetrates wood, whereas varnish and lacquer create a film over the surface. Oil left in pools or applied too thickly can stay sticky and dry slowly. Wipe away surplus instead of leaving it on top like a coating. Drying times vary between Danish oil products, so follow the tin’s directions before adding another layer or buffing.
What is Danish oil and which furniture finishes and wood types is it suitable for?
Danish oil is a variable blend used to finish wood, not one fixed formula for every timber. It’s suitable for interior and exterior wood when the product instructions match the surface and intended use. Apply it to bare wood, not over varnish or another existing finish. Outdoors, the finish wears off quickly and doesn’t provide long-term protection, so consider the setting before choosing it.
How do I prepare furniture before applying Danish oil?
Start with clean, dry bare wood. Sand with the grain, beginning with 220-grit paper and progressing to 320 grit to smooth the surface. Remove dust, grease and any previous finish before applying oil, since a sealed coating prevents it soaking into bare timber. Test a hidden spot first: Danish oil can darken the wood and emphasise its grain, changing the piece’s appearance.